Wednesday, March 23, 2011

Baby Steps

We've finally made enough of the necessary decisions to get started on the project.  We decided to begin with the garage to keep the project manageable as we continue to learn how to do this job properly.  For example, we are imagining laying out all of the siding in our basement while we apply the finish, but the house has more square footage of siding than of basement.

To make up for the material that will be lost in deconstruction, we've decided to add French doors to the south side of the garage and reside the north side of the garage in a different material.  Since the north side of the garage forms one half of a breezeway going to the backyard, it seems natural to use a different material in this area.  In addition, the boards on the breezeway make up almost a quarter of the house's siding, comparable to the amount we expect to lose in deconstruction, so if things go as planned, we won't run out of boards for the project because of what we save from this area.

Right now, we are considering tongue-and-groove cedar siding, installed vertically, for the breezeway, but we'll look around for some other options. Ideally, we'd like to use reclaimed wood for the vertical siding; brand-new boards wouldn't match the siding on the rest of the house as well. We'd also like to find a salvaged set of French doors and a larger window to replace the one on the west side of the garage. Luckily, the nearby ReBuilding Center and ReStore are good sources for this sort of thing. This SketchUp drawing of the garage shows the vertical siding on the north side and the additional door on the south side. It also shows one possible color scheme: "Asparagus" trim and "Cayenne" doors.


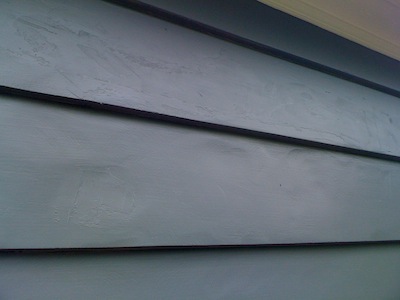
As far as refinishing the siding, we've abandoned the planer idea in favor of sanding down all the boards. The problem with the planer is that the outside surface of the boards is bumpy from where all of the patching material is installed, and in all likelihood, this uneveness will translate to the side we're trying to finish when we run it through the planer.  My experiments show that I can sand the boards using a random orbital sander with 60 and then 150 grit at a pace of about one foot per minute, so to do all of the siding from the whole house, we are looking at 20 hours of sanding; not too bad.

Monday, March 14, 2011

What are we thinking?

We first need to figure out whether reusing this cedar siding is a wise decision. We have about 1500 linear feet of siding on the house. Our conservative estimate is that we'll salvage 75% of the siding; the rest of it will either break or no longer fit when reversed.  That means that we can expect to end up with 1100+ feet of reusable siding.

Next, what will it cost to get the siding ready to go back up on the house?  A local deconstruction company gave a bid of $1600 to remove all the siding.  The back side of the cedar is unpainted and rough (see below). In order to get the boards ready for residing, we need to (a) cut the painted edge off each board and (b) get a smooth surface on the unpainted side.  The smooth surface could be achieved either by sanding, as in the picture below, or by running the boards through a planer.  The latter option requires building a jig to run the beveled boards through the planer.  A local millwork shop thought they might be able to get the job done for about $1000, but they'd never done anything like it, so it was going to be an experiment.  Sanding would probably cost a similar amount.

Top: taken directly from the house.  Bottom: sanded to 120 grit.

Rounding up, then, we should expect to spend roughly $3000 to end up with 400 feet less of siding than we started with. That's much less than the cost of buying new clear cedar siding, but our siding will have nail holes and staining; it won't look like new siding. In some ways, that's a good thing. As Coop15 points out on their blog, modern cedar siding has fewer than 10 growth rings per inch, making it weaker and less rot resistant than the wood that was used 60 years ago.  You can see our siding's dense growth rings in the picture below.

Closeup of siding removed from house showing growth rings.

There are also subjective considerations. Over the past 18 months, we've grown quite attached to our siding, and we feel somewhat responsible for the cosmetic damage that was inflicted on it. It's done its job for more than 60 years, and it doesn't seem right to send it to a landfill when it clearly still has so much to give.

Friday, March 11, 2011

The Job

Our house was built in 1949.  Roughly 60 years later, an inexperienced painting crew wreaked havoc on the exterior surface of the original cedar siding while attempting to deal with severely blistering paint.

Damaged cedar siding.

The house needs to be resided but we can't bring ourselves to dispose of 1500 linear feet of 10" wide clear cedar lap siding.  The plan is to remove the siding, flip it over to expose the unfinished side, and put it back on the house. 

Backside of cedar board pulled from the garage.

We decided to document this project because of the lack of available information about reusing cedar siding in this manner.  Coop15, a Seattle-based architecture firm, does mention having done this on their blog and they were kind enough to talk to me about their project.

Front of the house showing epoxy applied in an attempt to conceal sanding marks.

There are a lot of decisions to make in every phase, from deconstruction to refinishing to reconstruction.  Over the next couple of months we will be writing about the process.